
Replacing the LCD
The LCD screen is essential in resin 3D printing. An image of each layer is generated on the LCD while an array of LED chips project light through the LCD.
The LCD is a consumable part and may need to be replaced after a period of time. The following are the steps to changing the LCD:
For Sonic Mini / Sonic Mini 4K / Sonic Mighty
Removing the Old LCD
Step 1: Remove the plastic covering.
Step 2: Remove the resin vat and the building plate.
Step 3: Make sure the building plate on the Z-axis is lifted completely. If it isn’t, click TOOLS, and then click MANUAL, click on 10mm several times.
Step 4: Important, turn off the 3D printer and unplug the power cable.
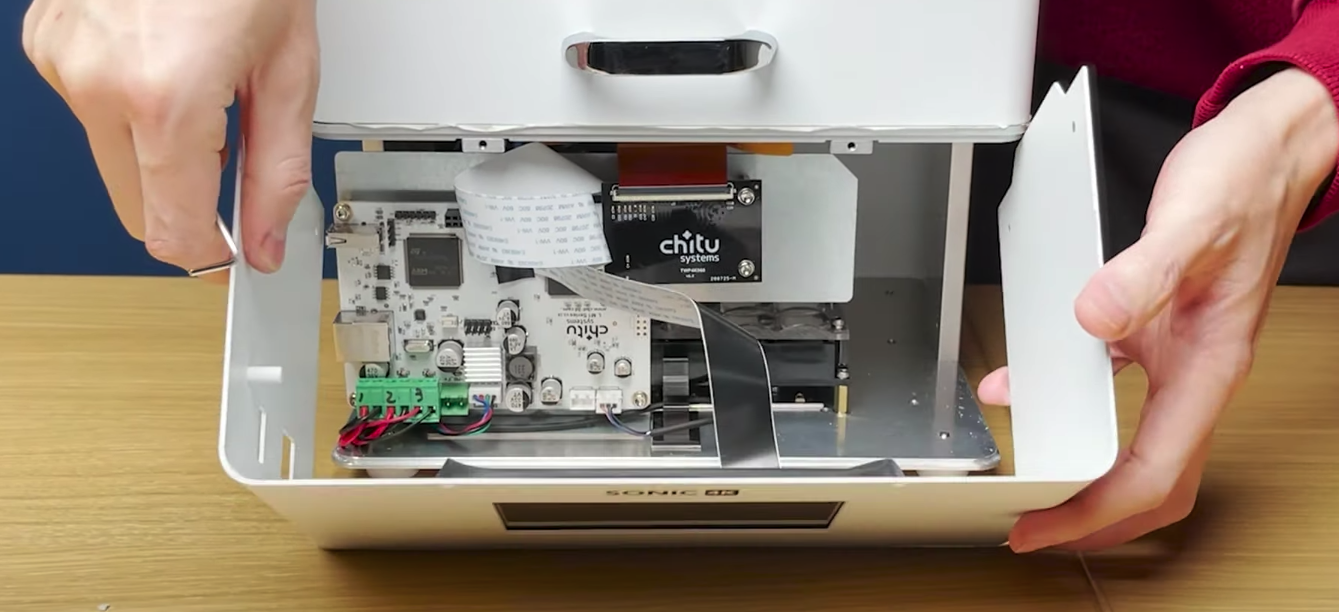
Step 5: Flip the 3D printer and remove the bottom with an m3 Allen wrench included in the toolbox.
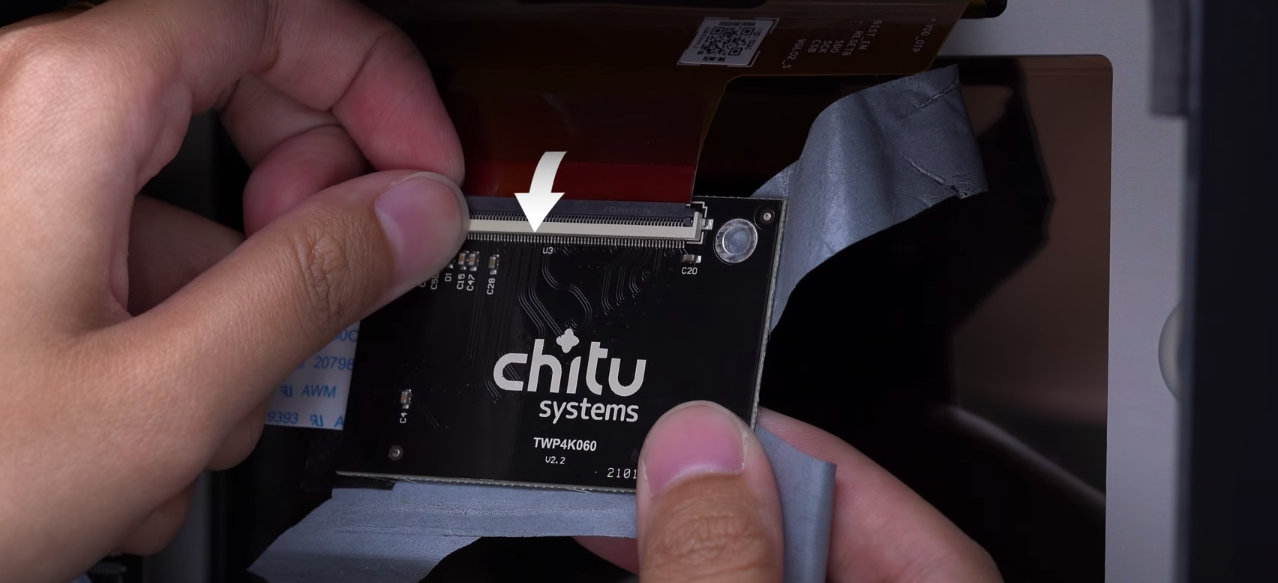
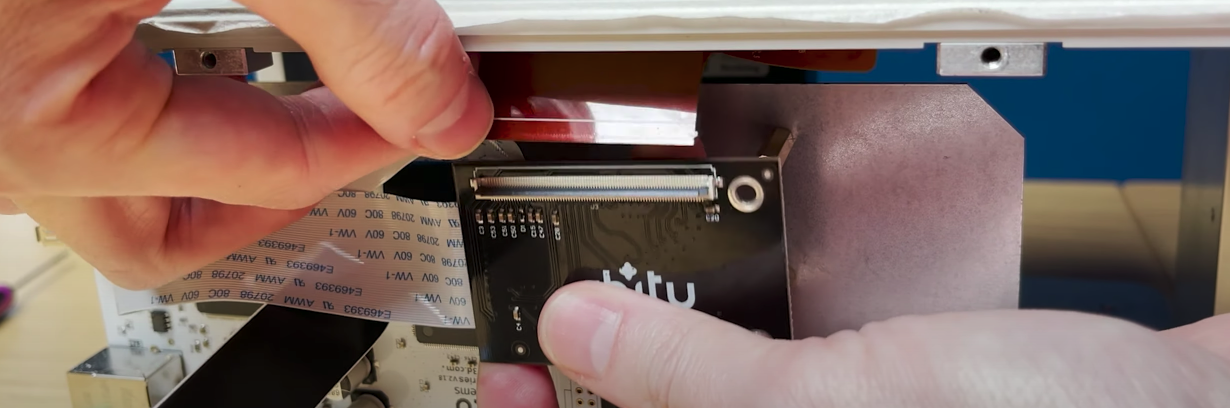
Step 6: Loosen the LCD ribbon cable connecting to the LCD control board (brown). Make sure to flip up the latch before removing the cable.
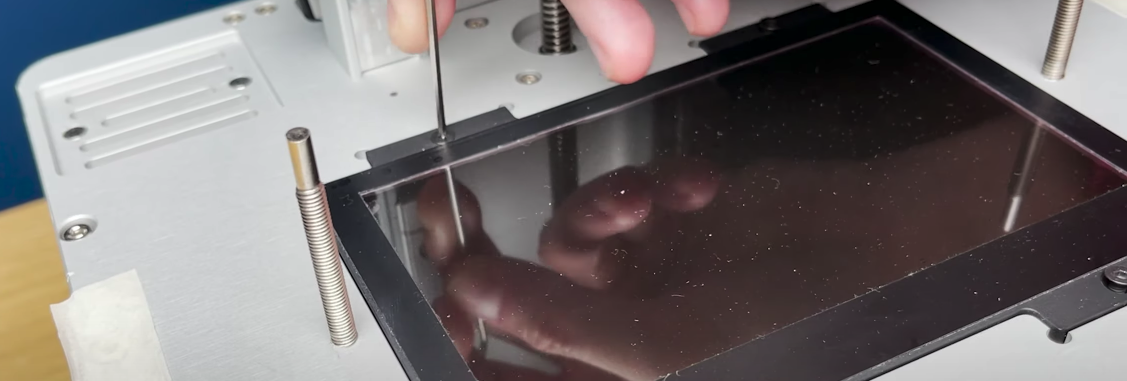
Step 7: Turn the 3D printer upright. Remove the black electric tape placed around the LCD. Then, remove the LCD; use a blade for assistance if necessary.
Placing the New LCD
Step 1: Place the new LCD in place and tape down all four sides with electric tape.
Step 2: Flip the 3D printer and attach the LCD's ribbon cable onto the mainboard.
Step 3: Place the bottom back onto the 3D printer and tighten the screws.
Step 4: Turn the 3D printer upright. Plug in the power cable, and turn on the 3D printer.
Step 5: Perform the LCD test to ensure that the LCD is functioning properly.
1. We suggest using black electricity tape, as it is water-proof, heat resistant, and doesn't conduct electricity.
2. Turn off the 3D printer and unplug the power cable before changing the LCD.
For Sonic Mega / Sonic Series / Shuffle Series / Make
Removing the Front Case
Step 1: Remove the resin vat.
Step 2: Make sure the building plate on the Z-axis is lifted completely. If it isn’t, click TOOLS, and then click MANUAL, click on 10mm several times.
Step 3: Important, turn off the 3D printer and unplug the power cable.
Step 4: Open the lower-front part of the printer.
Step 5: Unplug the cables which are attached to the front part, then remove the front case.
Removing the Old LCD
Step 1: Loosen the LCD ribbon cable connecting to the LCD control board (brown). Make sure to flip up the latch before removing the cable.
Step 2: Remove the black electric tape placed around the LCD.
Step 3: Remove the four screws on the LCD. (If there's any). Then remove the LCD; use a blade for assistance if necessary.
Placing the New LCD
Step 1: Place the new LCD in place and ensure it is aligned correctly, then tape down all four sides with electric tape.
Step 2: Attach the LCD's ribbon cable onto the control board.
Step 3: Plug in the cables back to the control board, and then place the screen frame back to the 3D printer.
Step 4: Screw the bolts back onto the 3D printer.
Step 5: Plug in the power cable, and turn on the 3D printer.
Step 6: Perform an LCD test to ensure that the LCD is functioning properly.
1. We suggest using black electricity tape, as it is water-proof, heat resistant, and doesn't conduct electricity.
2. Turn off the 3D printer and unplug the power cable before changing the LCD.
For Transform
Step 1: Remove the resin vat.
Step 2: Make sure the build plate on the Z-axis is lifted completely. If it isn’t, click TOOLS, and then click MANUAL, click several times on 10mm.
Step 3: Turn off the 3D printer and unplug the power cable.
Step 4: Remove all four bolts on the four corners of the LCD.
Step 5: Unplug the cables and the ribbon cable, which is attached to the control board.
Step 6: Remove the black electric tape placed around the LCD. Then remove the LCD; use a blade for assistance if necessary.
Step 7: Place the new LCD in place and ensure it is aligned correctly, then tape down all four sides with electric tape.
Step 8: Attach the LCD's ribbon cable onto the control board.
Step 9: Plug in the cables back to the control board, and place the LCD frame back onto the 3D printer.
Step 10: Screw the bolts back onto the 3D printer.
Step 11: Plug in the power cable, and turn on the printer.
Step 12: Perform an LCD test to ensure that the LCD is functioning properly.
1. We suggest using black electricity tape, as it is water-proof, heat resistant, and doesn't conduct electricity.
2. Turn off the 3D printer and unplug the power cable before changing the LCD.