
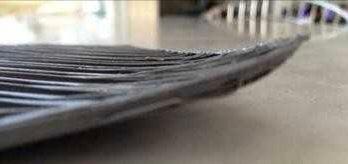
1、 What should I do if I find that the edge warping or consumables cannot be touched when printing?

1. Position leveling problem: stop printing and then re-leveling, see which position is warped, adjust the knob under the corresponding platform, and reduce the gap between the platform and the nozzle.
2. Bonding problems caused by temperature:
(1) Applying PVP adhesive on the hot bed platform can effectively prevent edge warping.
(2) Increase the line width of the first layer (bottom layer). The wider the line width, the more effective the contact with the platform and increase the adhesion.
(3) Turn off the cooling fan on the first floor. The cooling fan can accelerate the cooling of the model. If the printed model is relatively small, it will print the next layer without cooling, which is easy to cause the model deformation due to overheating. Generally, the fan is required to accelerate cooling.
However, when printing a large model, the fan blowing will make the plastic cool too fast and shrink, resulting in the edge warping. Therefore, generally speaking, when the model area is large, you can turn on the fan after the first layer is printed. Because the printing time of the first layer is relatively long and there is enough time for the plastic to cool, the fan can be turned on.
(4) . Reduce the printing speed. If you find that edge warping always occurs during printing, you can try to slow down. Slowing down can reduce warping.
(5) Use all kinds of glue. The adhesive can bring good adhesion and reduce the possibility of edge warping. For example, PVP glue stick, various anti-warping glue, anti-warping film, Meiwen paper, etc.
(6) . Improve the 3D model. Changing the shape of the bottom of the model can also reduce warping. For example, add the same edge as the mouse ear at the bottom of the model to increase the adhesion. In addition, when slicing, you can add more skirt edges, or simply use the bottom valve to increase the adhesion of the model.
(7) . Build an external thermostat for thermal insulation
2、 What if the consumables are blocked in the nozzle?
Turn off the machine first, then remove the two screws below the fan on the front of the extruder, then remove the fan and then remove the extruder, and you can see that a hole is leading to the nozzle; At this time, turn on the nozzle and heat it to 200 degrees, then press it down slowly along the hole with the cleaning needle, pull it out immediately after pressing it to the end (to avoid being stuck), press it down again and back several times, until the nozzle is no longer spinning, and then stop. Finally, install the extruder and consumables again, install the fan again, and restart the pre-heating and wire production test. If there is no problem, you can start printing
3、 Abnormal stop of printing process
There is a problem with the Gcode file in the SD card. Slice again/use another card.
4、 Print head leakage
The nozzle is not tightened, please check the tightening; Or replace the spare kit directly
5、 What about model dislocation
Printing speed or moving speed is too fast, try to reduce the speed
The X/Y axis belt is loose, and the timing wheel needs to be fixed tightly
6、 After printing, I feel the model is a little difficult to take
If it is not easy to take the mold at normal temperature, start the preheating of the platform to 60-80 degrees and then shovel the mold
7、 A motor of X/Y/Z axis emits strong abnormal noise and jitter
1. Shut down the machine and check whether the limit switch of the corresponding shaft is blocked by foreign matters, especially when it is reset to zero
2. The motor wire is loose, and plug it in again
3. If the driving current is too small or too large, it is necessary to disassemble the base to adjust the driving current
4. The motor is damaged. When a certain axis motor is moved through the console, it makes a loud noise and shakes, and there is no foreign matter. At this time, it is basically determined to be damaged.
8、 Abnormal preheating and wire discharge of nozzle
1. The nozzle is blocked and needs to be cleaned
2. If the printing temperature is too low, raise the temperature appropriately (generally 200 ℃, but not more than 220 ℃)
3. The heat dissipation of the print head is not enough. Check whether the cooling fan is normal
4. The nozzle kit is damaged and needs to be replaced